

Key Takeaways
- Healthy Baked Kale Chips are a simple, delicious snack that satisfy cravings without guilt.
- The recipe requires minimal ingredients and transforms kale into crispy chips in about 20 minutes.
- Kale is packed with nutrients and offers a tasty alternative to traditional chips.
- You can customize the flavors and seasonings to your liking, making it versatile.
- These chips store well for a few days and are budget-friendly compared to store-bought snacks.
Hey there, friends! If you’re anything like me, you’re always on the hunt for snacks that satisfy those crunchy cravings without leaving you feeling guilty afterward. You know the ones – the kind that make you feel energized instead of sluggish. Well, let me tell you about my absolute favorite go-to: Healthy Baked Kale Chips. I’ve been making these for years now, ever since I discovered how ridiculously easy (and delicious!) it is to turn a big bunch of leafy greens into something that tastes like a treat from a fancy chip aisle.
I remember the first time I tried making kale chips at home. I was skeptical – kale? Baked? Would it even be edible? But oh my gosh, one bite and I was hooked. They’re light, crispy, airy, and packed with so much flavor from simple seasonings. Plus, they’re actually good for you! In a world full of processed snacks loaded with who-knows-what, these feel like a little win every time I munch on them.
What makes this recipe so great? First off, it’s incredibly simple. We’re talking just a handful of ingredients, minimal prep, and about 20 minutes in the oven. No fancy equipment needed beyond what you probably already have in your kitchen. But the real magic is in the transformation – tough, curly kale leaves turn into these shatteringly crisp chips that are addictive in the best way.
These aren’t just “healthy because they’re veggies” – they’re genuinely tasty. The edges get a little browned and caramelized, giving them a nutty depth, while the olive oil and salt bring out that perfect savory umami. And the nutrition? Kale is a superstar: loaded with vitamins A, C, and K, plus antioxidants, fiber, and minerals. One serving of these chips gives you a huge boost without the calories or grease of traditional potato chips.
I love making a big batch on Sunday afternoons while listening to a podcast. The house smells amazing (kind of earthy and toasty), and I have healthy snacks ready for the week ahead. My kids even sneak handfuls – yes, kids eating kale voluntarily! That’s the ultimate endorsement if you ask me.
If you’re trying to eat more greens, cut back on junk food, or just want something new to nibble on during movie nights, this is your recipe. It’s versatile too – stick to basic salt and oil for purity, or jazz it up with spices. And the best part? They’re budget-friendly. A bunch of kale costs next to nothing compared to a bag of “healthy” store-bought chips.
Why should you try this recipe right now? Because it’s forgiving for beginners (I’ve burned a few batches in my day, and they still tasted good), it’s customizable to whatever flavors you’re craving, and it makes you feel like a kitchen rockstar. Plus, in January when everyone’s resetting habits, this is the perfect way to sneak in nutrients without feeling deprived.
Imagine reaching for a snack that’s crunchy, salty, and actually nourishing your body. That’s what these kale chips deliver. I’ve shared this recipe with friends who swore they hated kale, and every single one came back saying, “Okay, you were right – these are amazing!”
So, grab a bunch of kale next time you’re at the store or farmers’ market. Trust me, once you make these, you’ll wonder why you ever bought chips from a bag. Ready to give it a whirl? Let’s dive in – I promise you’ll be glad you did!
Ingredients
(Makes about 4 servings)
- 1 large bunch curly kale (about 10-12 oz or 300g) – Look for fresh, vibrant green leaves without yellowing.
- 1-2 tablespoons extra-virgin olive oil – Use good quality for best flavor; it helps crisp the leaves.
- ½ teaspoon fine sea salt (or to taste) – Sea salt or kosher salt sticks better than table salt.
- Optional: Freshly ground black pepper, garlic powder, or other seasonings (see variations)
Detailed Ingredients Explanation
Let’s break down why each ingredient matters:
- Curly kale: The star! Curly variety works best because its ruffled edges create more crispy texture. It’s packed with nutrients – more vitamin C than an orange, tons of vitamin A for eye health, and vitamin K for bones. Remove the tough stems because they don’t crisp well and can be bitter.
- Extra-virgin olive oil: Just enough to lightly coat the leaves so they crisp without burning. It adds healthy monounsaturated fats and a subtle fruity note. Too much oil makes them soggy, so we use sparingly.
- Sea salt: Enhances the natural flavor of the kale and draws out moisture for maximum crispiness. Use fine grain so it distributes evenly.
These three basics create magic, but the simplicity is what makes it shine.
Instructions
- Preheat your oven to 300°F (150°C). Line one or two large baking sheets with parchment paper (this prevents sticking and makes cleanup easy).
- Wash the kale thoroughly under cool water to remove any dirt. Pat completely dry with a salad spinner or kitchen towels – moisture is the enemy of crispiness!
- Remove the tough center stems: Hold the stem end and strip the leaves downward, or use a knife to cut along the stem. Tear the leaves into bite-sized pieces (about 2-3 inches) – they’ll shrink as they bake.
- Place the kale pieces in a large bowl. Drizzle with 1 tablespoon olive oil. Massage the oil into the leaves gently but thoroughly with your hands for about 1-2 minutes – this ensures even coating.
- Sprinkle with sea salt (start with ½ teaspoon) and toss again. Taste a piece and add more salt if needed.
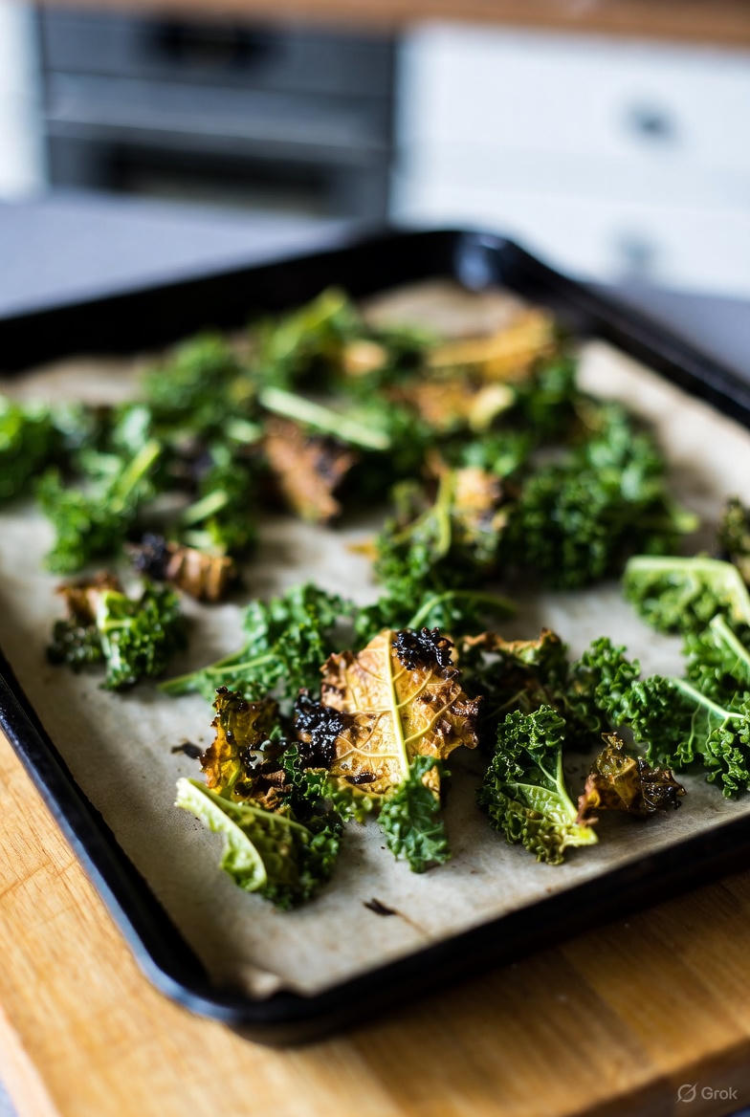
- Arrange the kale in a single layer on the prepared baking sheets. Don’t overcrowd – use two sheets if necessary for even baking.
- Bake for 15-20 minutes, rotating sheets halfway through. Check at 15 minutes – chips are done when they’re lightweight, crispy, and the edges are slightly browned (but not dark brown or they’ll taste bitter).
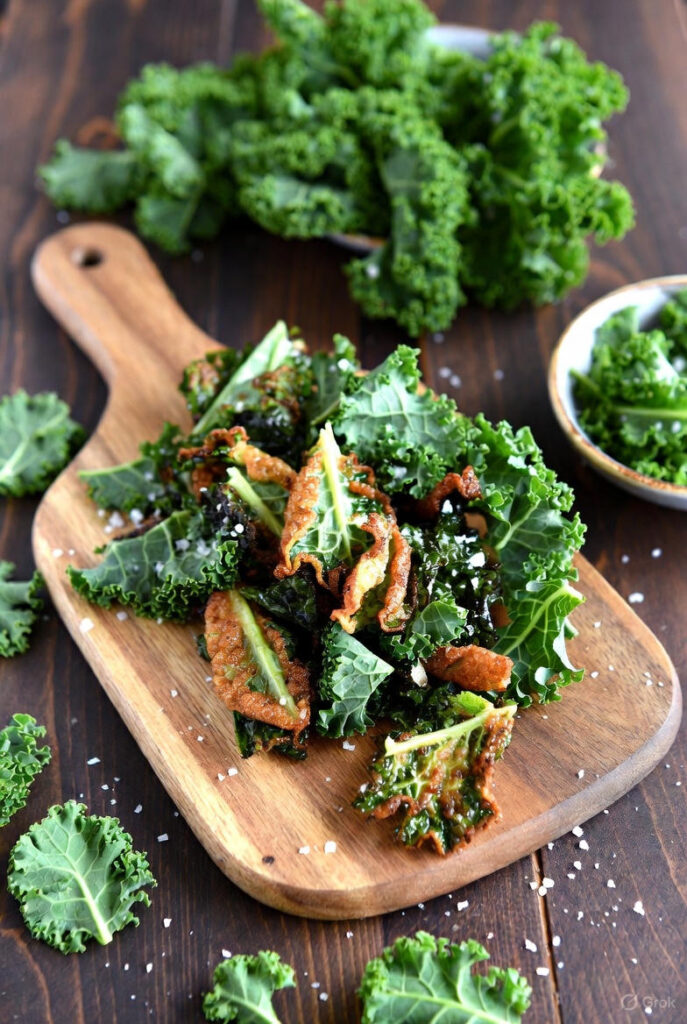
- Let cool for 5 minutes on the sheets – they’ll crisp up more as they cool. Enjoy immediately!
Storage Tips
Kale chips are best eaten fresh, but store leftovers in an airtight container at room temperature for up to 2-3 days. Add a silica packet or paper towel to absorb moisture and keep them crisp. Avoid the fridge – it adds humidity and makes them soggy.
Extra Tips for Success
- Dry, dry, dry! The #1 reason chips fail is residual water.
- Low and slow oven temp (300°F) prevents burning.
- Massage the oil in well – it helps seasonings adhere.
- Watch closely the last few minutes; ovens vary.
- Use convection setting if you have it for even crispier results.
Variations
- Cheesy (Vegan): Add 2 tbsp nutritional yeast before baking for a cheesy, umami flavor.
- Spicy: Toss with chili powder, cayenne, or smoked paprika.
- Garlic Parmesan: Sprinkle garlic powder and grated Parmesan (non-vegan).
- Lemon Pepper: Zest of one lemon + black pepper.
- Everything Bagel: Use everything bagel seasoning.
Make Ahead Options
Bake a double batch and store as above. Prep washed, torn kale up to 1 day ahead and keep in the fridge – toss and bake when ready.
What to Serve With
- As a snack on its own!
- Crumbled over salads or soups for crunch.
- Alongside hummus, guacamole, or yogurt dip.
- With sandwiches instead of chips.
- Movie night platter with popcorn and nuts.
Recipe FAQ
Why are my kale chips soggy? Too much oil or not fully dry. Use less oil next time and ensure kale is bone-dry.
Can I use other kale varieties? Yes! Lacinato (dino) kale works but is less curly/crisp. Red kale adds color.
Are these keto-friendly? Absolutely – very low carb!
My chips burned – help! Lower oven to 275°F next time or check earlier.
Can I make them oil-free? Possible but less crispy – try a light spray of broth instead.
There you have it – your new favorite healthy snack! Pin this, share it, and let me know in the comments if you make them. Happy baking!

Healthy Baked Kale Chips
Ingredients
- 1 large bunch curly kale about 10-12 oz or 300g – Look for fresh, vibrant green leaves without yellowing.
- 1-2 tablespoons extra-virgin olive oil Use good quality for best flavor; it helps crisp the leaves.
- ½ teaspoon fine sea salt to taste
- Optional: Freshly ground black pepper, garlic powder, or other seasons
Equipment
- Parchment paper
- Large mixing bowl with
- Salad Spinner
- Sharp knife
Method
- Preheat your oven to 300°F (150°C). Line one or two large baking sheets with parchment paper (this prevents sticking and makes cleanup easy).
- Wash the kale thoroughly under cool water to remove any dirt. Pat completely dry with a salad spinner or kitchen towels – moisture is the enemy of crispiness!
- Remove the tough center stems: Hold the stem end and strip the leaves downward, or use a knife to cut along the stem. Tear the leaves into bite-sized pieces (about 2-3 inches) – they’ll shrink as they bake.
- Place the kale pieces in a large bowl. Drizzle with 1 tablespoon olive oil. Massage the oil into the leaves gently but thoroughly with your hands for about 1-2 minutes – this ensures even coating.
- Sprinkle with sea salt (start with ½ teaspoon) and toss again. Taste a piece and add more salt if needed.
- Arrange the kale in a single layer on the prepared baking sheets. Don’t overcrowd – use two sheets if necessary for even baking.
- Bake for 15-20 minutes, rotating sheets halfway through. Check at 15 minutes – chips are done when they’re lightweight, crispy, and the edges are slightly browned (but not dark brown or they’ll taste bitter).
- Let cool for 5 minutes on the sheets – they’ll crisp up more as they cool. Enjoy immediately!
Nutrition
Notes
Storage Tips
Kale chips are best eaten fresh, but store leftovers in an airtight container at room temperature for up to 2-3 days. Add a silica packet or paper towel to absorb moisture and keep them crisp. Avoid the fridge – it adds humidity and makes them soggy.Extra Tips for Success
- Dry, dry, dry! The #1 reason chips fail is residual water.
- Low and slow oven temp (300°F) prevents burning.
- Massage the oil in well – it helps seasonings adhere.
- Watch closely the last few minutes; ovens vary.
- Use convection setting if you have it for even crispier results.
- Use the Yuka App to make sure you find quality ingredients free of harmful additives.
Variations
- Cheesy (Vegan): Add 2 tbsp nutritional yeast before baking for a cheesy, umami flavor.
- Spicy: Toss with chili powder, cayenne, or smoked paprika.
- Garlic Parmesan: Sprinkle garlic powder and grated Parmesan (non-vegan).
- Lemon Pepper: Zest of one lemon + black pepper.
- Everything Bagel: Use everything bagel seasoning.
Make Ahead Options
Bake a double batch and store as above. Prep washed, torn kale up to 1 day ahead and keep in the fridge – toss and bake when ready.What to Serve With
- As a snack on its own!
- Crumbled over salads or soups for crunch.
- Alongside hummus, guacamole, or yogurt dip.
- With sandwiches instead of chips.
- Movie night platter with popcorn and nuts.
One of my very favorite recipes!